Contents
Introduction to HDMI Cable Installation Tips
In this section, we’ll delve into the fundamentals of HDMI cables and their significance in modern home entertainment setups. HDMI (High-Definition Multimedia Interface) cables are widely used for transmitting high-quality audio and video signals between devices such as TVs, Blu-ray players, gaming consoles, and computers. Understanding how to properly install and set up HDMI cables is essential for optimizing the viewing and gaming experience.

1. Choosing the Right HDMI Cable
Choosing the correct HDMI cable is crucial for ensuring compatibility and optimal performance. Consider the following factors when selecting a cable:
HDMI Version Compatibility:
Ensure that the cable supports the HDMI version required by your devices. Newer versions offer additional features such as higher resolutions and refresh rates.
Cable Length and Quality:
Choose a cable length that suits your setup without excess slack. Higher-quality cables with better shielding and construction may offer improved signal integrity.
High-Speed vs. Standard-Speed HDMI Cables:
Determine whether you need a High-Speed HDMI cable for features like 4K resolution, HDR, or 3D content, or if a Standard-Speed cable will suffice for lower-resolution displays.

2. Preparing for Installation
Before physically installing the HDMI cable, it’s essential to make necessary preparations:
Determine Device Placement:
Decide where your devices will be located and plan the route for the HDMI cable accordingly. Consider factors such as distance, obstacles, and aesthetics.
Gather Tools:
Collect tools such as cable ties, wire cutters, and a stud finder if needed for wall mounting. Having the right tools on hand will streamline the installation process.
Power Off Devices:
To prevent electrical damage and interference, power off all devices involved in the setup before connecting the HDMI cable.
3. Installing the HDMI Cable
Now that you’re prepared, let’s proceed with installing the HDMI cable:
Identify HDMI Ports:
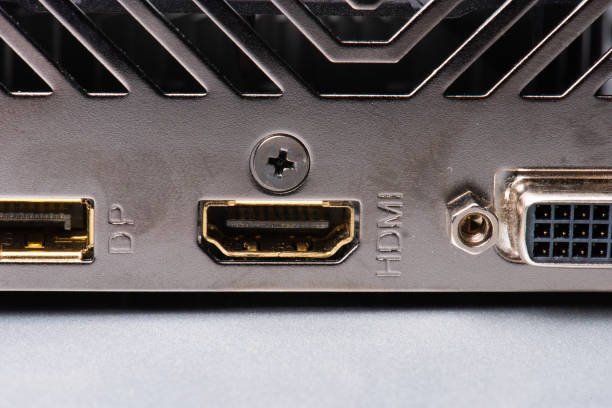
Locate the HDMI ports on your devices, typically labeled “HDMI IN” (input) and “HDMI OUT” (output).
Connect Output Device:
Attach one end of the HDMI cable to the HDMI output port of the source device, such as a Blu-ray player or gaming console.
Connect Input Device:
Connect the other end of the cable to the HDMI input port of the receiving device, such as a TV or AV receiver.

Secure Cable:
Route the cable along the planned path, securing it with cable ties or clips as needed. Avoid sharp bends or kinks that could degrade signal quality.
Avoid Interference:
Keep the HDMI cable away from sources of interference such as power cables and wireless devices to minimize signal degradation.
4. Testing the Connection
After installing the HDMI cable, it’s essential to verify that the connection is working correctly:
Power On Devices:
Turn on all devices involved in the setup, including the source and receiving devices.
Select Input Source:
Use the remote or on-screen menu to select the HDMI input on the receiving device corresponding to the connected source.
Check Signal:
Ensure that you have a stable picture and audio output. Test different resolutions and features to confirm proper functionality.
5. Troubleshooting Common Issues
Despite careful installation, you may encounter issues with your HDMI connection. Here are some common problems and troubleshooting steps:
Loose Connections:
Check that the HDMI cable is securely plugged into both devices. Re-seat the cable if necessary.
Compatibility Issues:
Verify that your devices support the same HDMI version and features. Check for firmware updates that may address compatibility issues.
Signal Interference:
Move away any sources of electromagnetic interference such as wireless routers or microwave ovens that could disrupt the HDMI signal.
Try Different Ports:
Test the HDMI cable on different ports of your devices to rule out faulty ports as the cause of the issue.
By following these steps and troubleshooting tips, you can ensure a smooth and hassle-free HDMI cable installation, resulting in an immersive home entertainment experience.
Conclusion
In conclusion, mastering the installation and setup of HDMI cables is essential for optimizing your home entertainment experience. By carefully choosing the right HDMI cable, preparing for installation, and following the proper steps to connect and test your devices, you can ensure seamless audio and video transmission between your various entertainment components. Additionally, being aware of common issues such as loose connections, compatibility issues, and signal interference empowers you to troubleshoot effectively and address any problems that may arise during installation or use. With the knowledge gained from this guide, you can confidently set up your HDMI cables with ease, enjoying crisp visuals and immersive sound quality for your favorite movies, games, and multimedia content.
Remember, a well-installed HDMI cable not only enhances your viewing and gaming pleasure but also serves as the backbone of your home entertainment system, delivering high-definition content from source to screen. So, take the time to install your HDMI cables properly, and reap the rewards of a truly immersive entertainment experience.
FAQs (Frequently Asked Questions)
Q1: What is HDMI?
Q2: How do I know which HDMI cable to choose?
Q3: Can I use any HDMI cable for 4K resolution?
Q4: What should I do if my HDMI connection isn’t working?
Q5: Can HDMI cables be used for audio only?

